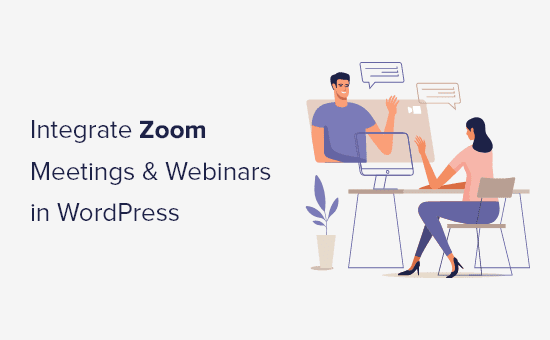


Do you want to easily integrate Zoom meetings and webinars in WordPress?
By integrating WordPress with Zoom you can automatically enroll customers, visitors, and new members into Zoom video calls and webinars.
In this article, we’ll show you how to easily integrate Zoom meetings and webinars in WordPress step by step.
Why Integrate Zoom Meetings and Webinars with WordPress?
Integrating Zoom with WordPress lets you easily automate your meeting and webinar registration process. This can save you a lot of time that you can spend on other business tasks.
Zoom is one of the most popular meeting, webinar, and video conference call software in the world used by over 300 million daily participants.
It’s a must have tool for businesses with remote teams or WordPress website owners who need to get in touch with customers and clients virtually.
With that said, let’s take a look at how you can easily integrate Zoom meetings and webinars in WordPress.
Install and Activate the Uncanny Automator Plugin for WordPress
The easiest way to connect Zoom with WordPress is by using Uncanny Automator. It’s the best WordPress automation plugin that helps you create automated workflows in WordPress without writing any code.
It’s like Zapier for WordPress websites, but without the high costs.
Uncanny Automator acts as a bridge between different plugins, apps, and tools and lets them talk to each other. It’s equipped with all kinds of automated workflows that you can set up in a couple of clicks.
To learn more, see our article on how to create automated workflows in WordPress with Uncanny Automator.
First thing you need to do is install and activate the Uncanny Automator plugin. For more details, see our step by step guide on how to install a WordPress plugin.
Upon activation, you’ll also be asked to install the free version of Uncanny Automator. The lite version of the plugin has limited features, but it will be used as the base for the pro version.
Then, you need to navigate to Automator » License activation and enter your license key. You’ll find this information under your account on the Uncanny Automator website.
Now that Uncanny Automator is installed and activated, let’s move onto setting up your Zoom account.
Set Up Your Zoom Account the Right Way
In order to integrate Zoom and WordPress, you need at least the Pro version of Zoom and the Zoom webinar addon.
There is a free version, but you’ll need to have a paid account in order to set up the integration.
First, head over to Zoom and sign up for the plan that best suits your needs. If you want to integrate webinars, then you need to purchase the Zoom webinar addon too.
Once you have a premium account, go to the Zoom App Marketplace and sign in to your account. Here you will create an app that sends data between Zoom and WordPress.
Next, click the ‘Develop’ menu item and select ‘Build App’ from the drop down menu.
This brings you to a screen where you can choose the type of app to build.
Locate the ‘JWT’ box and click ‘Create’.
Next, you can name your app in the popup. The name is to help you remember the purpose of the app, and won’t be visible to your visitors.
Enter your app name and click ‘Create’.
On the next screen, you need to enter your ‘Basic Information’ and ‘Developer Contact Information’. This will be used so the Zoom team can reach out to you if needed.
After that, click ‘Continue’ at the bottom of the screen.
Next, you need to copy the ‘API Key’ and the ‘API Secret’ key and paste them into your favorite text editor to save them for now.
Then, click ‘Continue’.
After that, you can click ‘Continue’ on the next screen too.
Then, you’ll get an app activation notification similar to the image below.
Create a New Zoom Meeting
Now, you can create a new Zoom meeting that you’ll connect to your WordPress site.
Inside your Zoom account click the ‘Schedule a Meeting’ link, and then fill in your meeting details.
Make sure you check the ‘Required’ box in the Registration section, otherwise the integration won’t work.
Then, click the ‘Save’ button at the bottom of the screen.
Create a New Zoom Webinar
To create a new Zoom webinar, click the ‘Webinars’ menu option under the ‘Personal’ tab inside your Zoom account, and then click the ‘Schedule a Webinar’ button.
On the next page, you can enter all of your webinar information.
Just like creating a Zoom meeting, you need to make sure the ‘Required’ box is checked in the Registration section.
After that, click the ‘Save’ button at the bottom of the page.
Connect Zoom Meetings and Webinars with WordPress
After Uncanny Automator is activated and Zoom is set up, you need to connect both of these together.
To connect them, first go to Automator » Settings from your WordPress dashboard and click on the ‘Zoom Meeting’ menu option.
Then, paste the ‘API Key’ and ‘API Secret’ keys that you copied earlier.
Once you’re done, make sure to click ‘Save API details’.
If you want to integrate Zoom webinars too, then click the ‘Zoom Webinar’ menu option.
Then, paste the same ‘API Key’ and ‘API Secret’ keys that you used above and click ‘Save API details’.
Now that we’ve set up Zoom and integrated it with WordPress, let’s look at some of the neat things you can do with this Uncanny Automator integration.
Register Users for a Zoom Meeting After Form Completion in WordPress
This integration will automatically register users for a Zoom meeting the moment they fill out a form on your website. This can be used to onboard new clients, schedule coaching calls, and more.
If you don’t have an active WordPress form on your website, then you need to create one now.
Uncanny Automator works with all major forms solutions including WPForms, Formidable Forms, and more.
For this tutorial, we’ll be using WPForms. It’s the best contact form plugin for WordPress used by over 4 million websites. There’s also a webinar form template in the form templates pack addon that makes form creation easy.
For more details, see our step by step guide on how to create a contact form in WordPress.
Now, you’re ready to connect your WordPress form with Zoom.
To do this, you’ll be creating what’s called a “recipe”. In Uncanny Automator, “recipes” are the automations that link different plugins and apps together.
To get started, navigate to Automator » Add new, click the ‘Anonymous’ option, then click the ‘Confirm’ button.
Anonymous recipes can be triggered by any user, while logged-in recipes can only be triggered by users logged in to your website.
You need to choose the type of recipe that best suits your needs and then click the ‘Confirm’ button.
Next, you’ll be asked to give your recipe a name. This will help you remember the different recipes you create, without being visible to your users.
Each recipe has two different parts, the trigger and the action.
The trigger is the event that will start the recipe, and the action is the task that runs after the trigger takes place.
For your first trigger, you need to select ‘WPForms’ in the ‘Anonymous trigger’ meta box.
Then you have two different options to choose from.
We’ll select the ‘A form is submitted’ option, since this will send all form submissions to Zoom.
After that, select your form from the drop down list, then click the ‘Save’ button.
Next, you need to create a new ‘Subscriber’ user in WordPress. This new user role will be used to send the form data to Zoom.
For more details, see our guide on how to add new users and authors to your WordPress blog.
Once you’ve done that, choose the ‘Existing user’ option in the ‘Actions’ meta box.
This brings up new panel called ‘Set user data’. Here you will enter the information from the new user you just created.
Select the ‘ID’ option and enter the ID number from the new user.
The, click the ‘Do nothing’ radio button.
After this, click the ‘Save’ button to save your recipe so far.
If you don’t know the user ID, then navigate to Users » All Users in your WordPress admin panel.
Then, open up the new user and locate the user ID in the web page URL.
Once you’ve done that, click the ‘Add action’ button.
Then, you need to select ‘Zoom Meetings’ from the list of integrations.
This will give you two different options to choose from.
To add a new user, select the ‘Add the user to a meeting’ drop down.
Then, you can choose the Zoom meeting you want users to register for in the ‘Meeting’ box, and then click ‘Save’.
You want to make sure you’re selecting the right meeting name, otherwise users will be registered for the wrong meeting.
To publish your recipe, all you need to do is click the toggle in the ‘Recipe’ box, so it turns to ‘Live’.
Now, when your users fill out the form, they’ll automatically be registered for your Zoom meeting.
Register Users for a Zoom Webinar After Form Completion in WordPress
Another popular integration is registering users for a webinar when they fill out a form on your website.
To do this, you will follow the same steps as above. However, you’ll select ‘Zoom Webinars’ instead of ‘Zoom Meetings’ in the actions section.
First, follow the same initial ‘Triggers’ section as above.
Then, click the ‘Add action’ button and select ‘Zoom Webinars’.
This will bring up a drop down menu.
Simply select ‘Add the user to a webinar’ from the list.
Then, select your webinar from the drop down list and click ‘Save’.
Next, you need to make your recipe live, so new users will be automatically enrolled in your webinar.
To do this, simply click the toggle in the ‘Recipe’ box, so it says ‘Live’.
Register Customers for a Zoom Webinar After Purchase in WordPress
Another way to connect WordPress with Zoom is to enroll new customers in a product webinar after they make a purchase on your WooCommerce shop.
First thing, you need to have your WooCommerce store set up. If you’re still building your store, then see our step by step guide on how to start an online store.
After your WooCommerce store is set up you can navigate to Automator » Add new, click the ‘Anonymous’ option, then click ‘Confirm’.
Once you’ve done that, you can give your recipe a name.
Then, select ‘WooCommerce’ in the ‘Anonymous trigger’ meta box.
This brings up a drop down list of trigger options.
Select the first option from the list, since this refers to a customer completing an order.
After that, select the ‘completes’ option in the ‘Trigger condition’ box to start the automation when a customer completes a purchase.
Then, click ‘Save’.
Now, you can choose a specific product in your store or have the automation run when a customer purchases any product.
Simply select the product, or products, you want to be part of the automation, and then click ‘Save’.
Now, you can move onto the Actions section. You’ll see different options here depending on if you chose the anonymous or logged-in recipe above.
If you chose the ‘Anonymous’ option, then you need to create a new Subscriber in WordPress. This new subscriber role will be used to send the WooCommerce order data through.
For more details, see our guide on how to add new users and authors to your WordPress blog.
Then, select the ‘Existing user’ option in the ‘Actions’ meta box.
This brings up a box for you to enter your new subscriber information. Select the ‘ID’ option and enter the user ID.
Then, click the ‘Do nothing’ option and click ‘Save’.
If you don’t know the user ID, then you can find it by navigating to Users » All Users and editing the user profile.
In the URL for the page, you’ll find the user ID.
Once you’ve done that, click the ‘Add action’ button.
Then, choose the ‘Zoom Webinars’ integration from the list.
Next, select ‘Add the user to a webinar’ from the drop down list.
This will automatically register new customers for your webinar.
After that, you need to choose the webinar from the drop down list in the ‘Webinar’ box.
If you have multiple webinars running, then make sure to choose the webinar that’s associated with your WooCommerce products.
The last thing you need to do is make your recipe live.
To do this, simply click the toggle in the ‘Recipe’ box, so it says ‘Live’.
Now, when your customers purchase a product, they’ll automatically be registered for your product webinar.
Register Members for a Zoom Meeting After Sign Up in WordPress
When you’re running a membership site, registering new members for a Zoom call can be a great way to welcome them into your community.
If you haven’t set up your site yet, then see our ultimate guide to creating a WordPress membership site.
You can also register new users for a Zoom orientation call when they join your online course.
After your website is set up you can navigate to Automator » Add new, click the ‘Logged-in’ option, then click ‘Confirm’.
We’ll be choosing the logged-in recipe, since new members will have an account on your website.
Next, select the ‘MemberPress’ trigger in the ‘Logged-in triggers’ box.
Here, you have a few different triggers to choose from.
We’ll select ‘recurring subscription product’, but you can select the product type that’s right for your site.
Next, you need to choose the subscription product from the drop down in the ‘Product’ box.
After that, click the ‘Save’ button.
Now, it’s time to add an action to your recipe.
Simply click the ‘Add action’ button in the ‘Actions’ box.
This brings up a list of available integrations.
Here you can choose the ‘Zoom Meetings’ integration.
Next, you’ll have two different options to choose from.
You need to select the ‘Add the user to a meeting’ option.
Then, select the Zoom call for your new members in the ‘Meeting’ box.
After that, click the ‘Save’ button.
The last thing you need to do is make your recipe live.
To do this, simply click the’ Draft’ toggle in the ‘Recipe’ box, so it turns to ‘Live’.
Now your new members will automatically be enrolled in a Zoom member orientation call.
Besides Zoom, Uncanny Automator also allows you to create countless other recipes for different plugins and apps like Twilio and Google Sheets.
We hope this article helped you easily integrate Zoom meetings and webinars in WordPress. You may also want to check out our ultimate guide on how to start a podcast, or our expert comparison of the best business phone services for small business.
If you liked this article, then please subscribe to our YouTube Channel for WordPress video tutorials. You can also find us on Twitter and Facebook.
This content was originally published here.